[iOS] AVSpeechSynthesizer In Background
[ 배경 지식 ]
AVAudioSession
AVAudioSession 은 앱과 시스템의 중개자로서 오디오를 사용하는 방법을 시스템에게 전달하는 객체입니다.
Default Audio Session은 기본 동작은 제공하지만 media app에서 필요한 오디오 동작들까지는 제공하지 않습니다.
앱의 audio session category 를 설정해줌으로서 기본 동작을 바꿀 수 있습니다.
category 종류로는 7가지가 있습니다. (참고: Audio Session Categories and Modes)
재생 앱이 가장 많이 사용하는 category는 playback 입니다. (녹음된 음악 또는 기타 사운드를 재생하는 카테고리 / 기본 nonmixable 옵션)
이 카테고리는 오디오 재생이 앱의 중앙 기능임을 나타냅니다.
이 카테고리를 지정하면, Ring/Silent 스위치가 자동 모드로 설정된 상태에서도 앱의 오디오가 계속됩니다 (iOS only)
이 카테고리로 background audio 를 재생시킬 수 도 있습니다. (Enabling Background Audio 를 했을 시)
이 configuration은 예제 코드처럼 앱이 런치될 때 해주는 게 좋습니다.
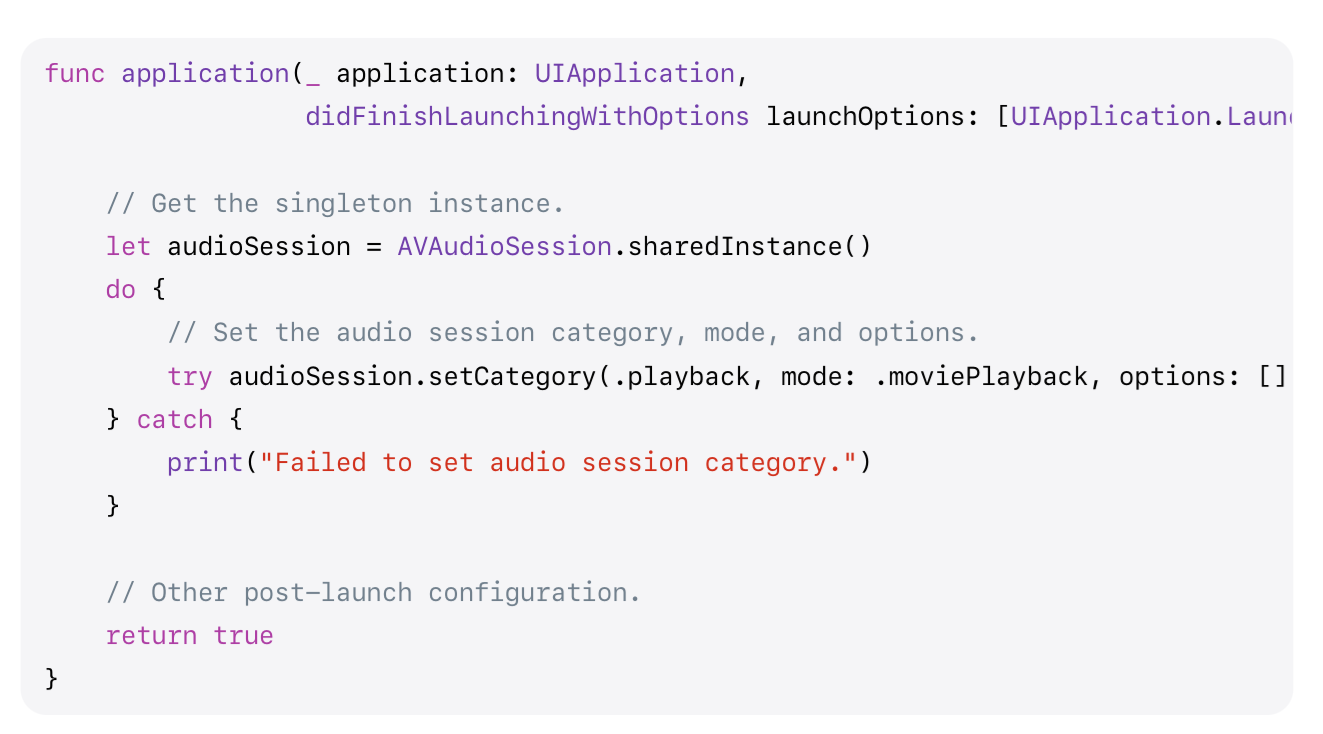
너가 setActive(_:) or setActive(_:options:) method 를 통해서 session을 activate 시켜줬을 때,
audio session은 이 configuration을 사용하게 됩니다.
[ TTS를 백그라운드 모드에서도 재생하기 ]
두단계만 해주면 끝!
프로젝트 세팅의 Background Modes > Audio ~~ 를 켜줍니다.

2. Configure AVAudioSession
AppDelegate > didFinishLaunchingWithOptions 에서 아래 코드를 추가해줍니다.
(두번째 라인 setActivate를 안해줘도 configuration이 잘 적용되는 것 같음)
try? AVAudioSession.sharedInstance().setCategory(.playback, mode: .default)
try? AVAudioSession.sharedInstance().setActive(true)
+ 주의사항
iOS 13부터 usesApplicationAudioSession 가 추가되었습니다.
AVSpeechSynthesizer는 Default Audio Session ( 코드로 하면 AVAudioSession.sharedInstance() ) 을 사용하는데,
이것을 false로 해주면 이를 안쓰고 separate audio session 을 사용하게 됩니다.
  if #available(iOS 13.0, *) {
      self.synthesizer.usesApplicationAudioSession = false
  }
[ Control Center에서 background audio 제어할 수 있게 하기 ]
background audio를 지원한다면 Control Center에서 이를 제어할 수 있게 해주면 좋습니다.
Controlling Background Audio 문서를 보고 테스트하면 됩니다.
두 곳을 봐주면 됩니다.
- 왼쪽 사진 : (이름 모름) 에서 Control Center
- 오른쪽 사진 : iOS LockScreen 에서 Control Center
