
 [Git] Merge vs Rebase 커밋내역 비교
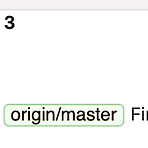
[ 사전 준비 ] develop 브랜치를 base로 feature1과 feature2를 브랜치를 만들어줬습니다. 그리고 develop에서 commit 3개를 해줍니다. feature1은 merge 커밋내역을 확인할 용도로 쓸 브랜치입니다. feature1에서 commit 2개를 해줍니다. feature2은 rebase 커밋내역을 확인할 용도로 쓸 브랜치입니다. feature2에서 commit 2개를 해줍니다. [ Merge ] feature1로 develop을 머지해보겠습니다. 트리가 이렇게 그려집니다. 줄기가 2개! (current branch를 feature1로 골라줬어요) [ Rebase ] feature2로 develop을 rebase 해보겠습니다. 트리가 이렇게 그려집니다. 줄기가 1개! (cu..
 [Firebase-DB] Firebase 예제 프로젝트(fetch) - Realtime DB에서 데이터 가져오기
일단 feature브랜치로 firebase-fetch를 하나 만들고 작업을 시작합니다 memos의 어떤 변화든 관찰하겠다(?) 하는 코드인데, let rootRef = Database.database().reference() rootRef.child("memos").observe(.value) { snapshot in let memosDic = snapshot.value as? [String: Any] ?? [:] for (key, value) in memosDic { print("key \(key) value\(value)") } } 딕셔너리를 출력해보면 key는 자동으로 만들어준 메모의 아이디 / value는 해당메모의 속성에 대한 딕셔너리이다 key -Lfu2XqePDtQA6KcyvJs value{..
 [Firebase-DB] Firebase 예제 프로젝트(insert) - Realtime DB에 데이터추가
FirebaseManager 클래스를 만들고 class fuction인 add를 만들어준다 import Foundation import Firebase class FirebaseManager { class func add(memo: Memo) { let rootRef = Database.database().reference() let memosRef = rootRef.child("memos") let memoRef = memosRef.childByAutoId() memoRef.setValue(memo.toDictionary()) } } Memo 구조체에 dictionary로 바꾸는 함수도 추가해준다 struct Memo { let title: String } extension Memo { func toD..
 [Firebase] Firebase 예제 프로젝트(setup) - Firebase 설치하기
1. firebase-setup 이라는 feature 브랜치를 만든다 2. podfile에 pod 'Firebase/Core' 를 추가한다 실시간 데이터베이스를 사용할 것이므로 pod 'Firebase/Database' 이것도 추가하고 설치해준다 3. Firebase console 에 들어가서 프로젝트를 추가한다 4. Firebase에서 친절히 알려주는 대로 설정을 해준다 5. 앱이 콘솔에 추가되면 Realtime Database를 만들어준다 테스트 모드로 설정해서 읽기 쓰기 가능하게 해준다 --! 이것은 나중에 '규칙'에서 바꿀 수 있다
 [Firebase] Firebase 예제 프로젝트 - 프로젝트 구성
Firebase를 이용하여 메모를 추가하고 수정/삭제 할 수 있는 간단한 프로젝트를 해보자 : ) 플러스버튼을 눌러서 메모를 저장하고 왼쪽 스와이프로 메모를 수정, 오른쪽 스와이프로 삭제 하도록 프로젝트를 구성하자 이렇게 MVVM 구조로 프로젝트를 짰고 Rx를 사용하였다 : ) 소스코드는 깃헙 에서 볼 수 있다 + git도 같이 연습해보기 위해 master브랜치를 따서 develop브랜치를 만들었다 그 후, feature branch들로 firebase-setup / firebase-insert / firebase-delete / firebase-change 를 만들고 develop 브랜치에 merge해가면서 작업할 것이다 --!
 [RxSwift-ControlProperty] ControlProperty의 orEmpty
textField.rx.text 하고 subscirbe하면 옵셔널 타입으로 String? 을 받아오는데, 옵셔널 말고 String으로 받아오고 싶으면 orEmpty를 쓰자 -! @IBOutlet weak var addMemoTextField: UITextField! addMemoTextField.rx.text.subscribe { print($0) }.disposed(by: bag) addMemoTextField.rx.text.orEmpty.subscribe { print($0) }.disposed(by: bag) * 결과 next(Optional("ㅇ")) next(ㅇ) * 결과 next(Optional("") next()
 [Navigation Bar] 스토리보드에서 Large title text 설정하기
네비게이션 컨트롤러의 Navigation bar를 클릭한다 - 일단 Navigation bar의 뿌연 효과를 없애주기 위해 Translucent 를 체크 해지한다 - Prefers Large Titles를 체크하고 large title text attributes를 설정한다 - title text attributes도 large title text attributes와 동일하게 설정해준다 (밑의 사진처럼 테이블 뷰가 스크롤업되면 작은 title로 나오기 때문) ================== iOS 13 부터 변화가 있습니다 ==================== https://forums.developer.apple.com/thread/122100 barTintColor not working corre..
 [Popup] 팝업 띄우기
이런 식으로 투명하게 살짝 까만 팝업을 띄우려면 어떻게 해야할까?!? 1. Popup 뷰컨트롤러를 만들어준다 2. background color를 까만색으로 하고 opacity를 조정하여 투명도를 준다 (나는 55%로 설정) ⚠️ 주의 ⚠️ 이렇게 view의 Alpha 값을 지정해서 투명하게 해줄 수 도 있지만, 알파는 뷰에 있는 모든 객체를 다 투명하게 해준다 3. 팝업을 띄우는 쪽에서 popupVC.modalPresentationStyle = .overCurrentContext 해주기 2까지만 하고 팝업을 띄우는 뷰컨트롤러쪽에서 present하면 투명도를 지정해줬지만, 까만 화면이 나온다..! modalPresentationStyle 를 설정해줘야한다..! @IBAction func showPopup..

 [iOS-ARKit] SCNText, SCNBox, SCNSphere 를 띄워보자
SCNGeometry를 상속받은 친구들 중, SCNText, SCNBox, SCNSphere 를 화면에 띄워보자 : ) 일단 프로젝트를 만들면 scene에 기본으로 넣어져있는 ship.scn을 지우고 scene에 아무 것도 없게 해준다 let scene = SCNScene(named: "art.scnassets/ship.scn")! 즉 이렇게 시작한다 class ViewController: UIViewController, ARSCNViewDelegate { @IBOutlet var sceneView: ARSCNView! override func viewDidLoad() { super.viewDidLoad() // Set the view's delegate sceneView.delegate = self /..
- Total
- Today
- Yesterday
- Python Type Hint
- Flutter Spacer
- METAL
- flutter dynamic link
- PencilKit
- DRF APIException
- ribs
- 구글 Geocoding API
- Sketch 누끼
- Flutter 로딩
- 플러터 얼럿
- Django Heroku Scheduler
- 장고 URL querystring
- 장고 Custom Management Command
- Flutter getter setter
- flutter build mode
- Watch App for iOS App vs Watch App
- drf custom error
- 플러터 싱글톤
- cocoapod
- flutter 앱 출시
- SerializerMethodField
- Dart Factory
- ipad multitasking
- flutter deep link
- Flutter Text Gradient
- Flutter Clipboard
- Django Firebase Cloud Messaging
- github actions
- Django FCM
| 일 | 월 | 화 | 수 | 목 | 금 | 토 |
|---|---|---|---|---|---|---|
| 1 | ||||||
| 2 | 3 | 4 | 5 | 6 | 7 | 8 |
| 9 | 10 | 11 | 12 | 13 | 14 | 15 |
| 16 | 17 | 18 | 19 | 20 | 21 | 22 |
| 23 | 24 | 25 | 26 | 27 | 28 |