
티스토리 뷰
Flutter 앱 자동배포 구축 - iOS 편 에서 이어집니다.
Getting started with fastlane for Android 문서를 참고해주세요
[1] fastlane init
안드로이드 폴더로 이동해서 아래 명령어를 실행시켜주세요
fastlane init
[2] Package Name
Package Name을 물어보는데 대답해줍니다.

app/build.gradle의 applicationId를 알려주면 됩니다.

[3] json secret file
그 다음 json secret file의 경로를 물어보네요

json secret file을 만들어서 path를 알려줘야해요!+!
Getting started with fastlane for Android 문서의 Collect your Google credentials에 있는 절차를 진행해줘야합니다.

Google Play Console 에 들어가주세요
여기서 API 액세스를 눌러줍니다

그리고 서비스 계정 만들기를 눌러주세요

버튼 누르면 팝업이 뜨는데, Google API 콘솔 링크 타고 들어가주세요

그럼 이런 페이지로 들어가지는데, 파란박스 쳐둔 '서비스 계정만들기' 를 눌러주세요
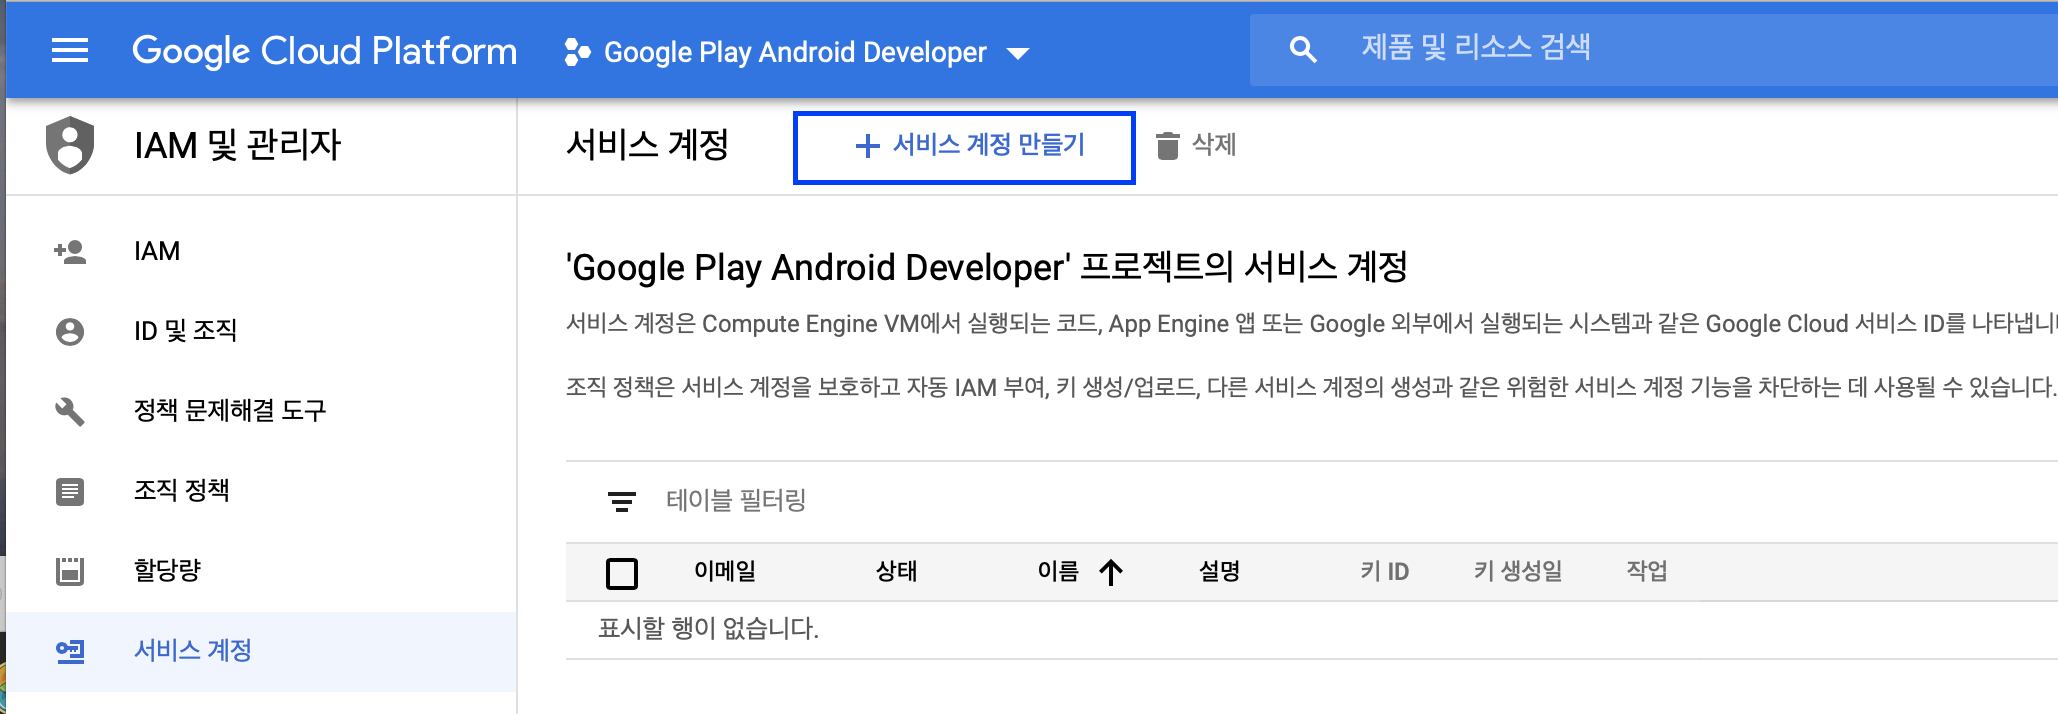
1단계. 서비스 계정 정보 입력해주기

2단계. 역할 입력해주기
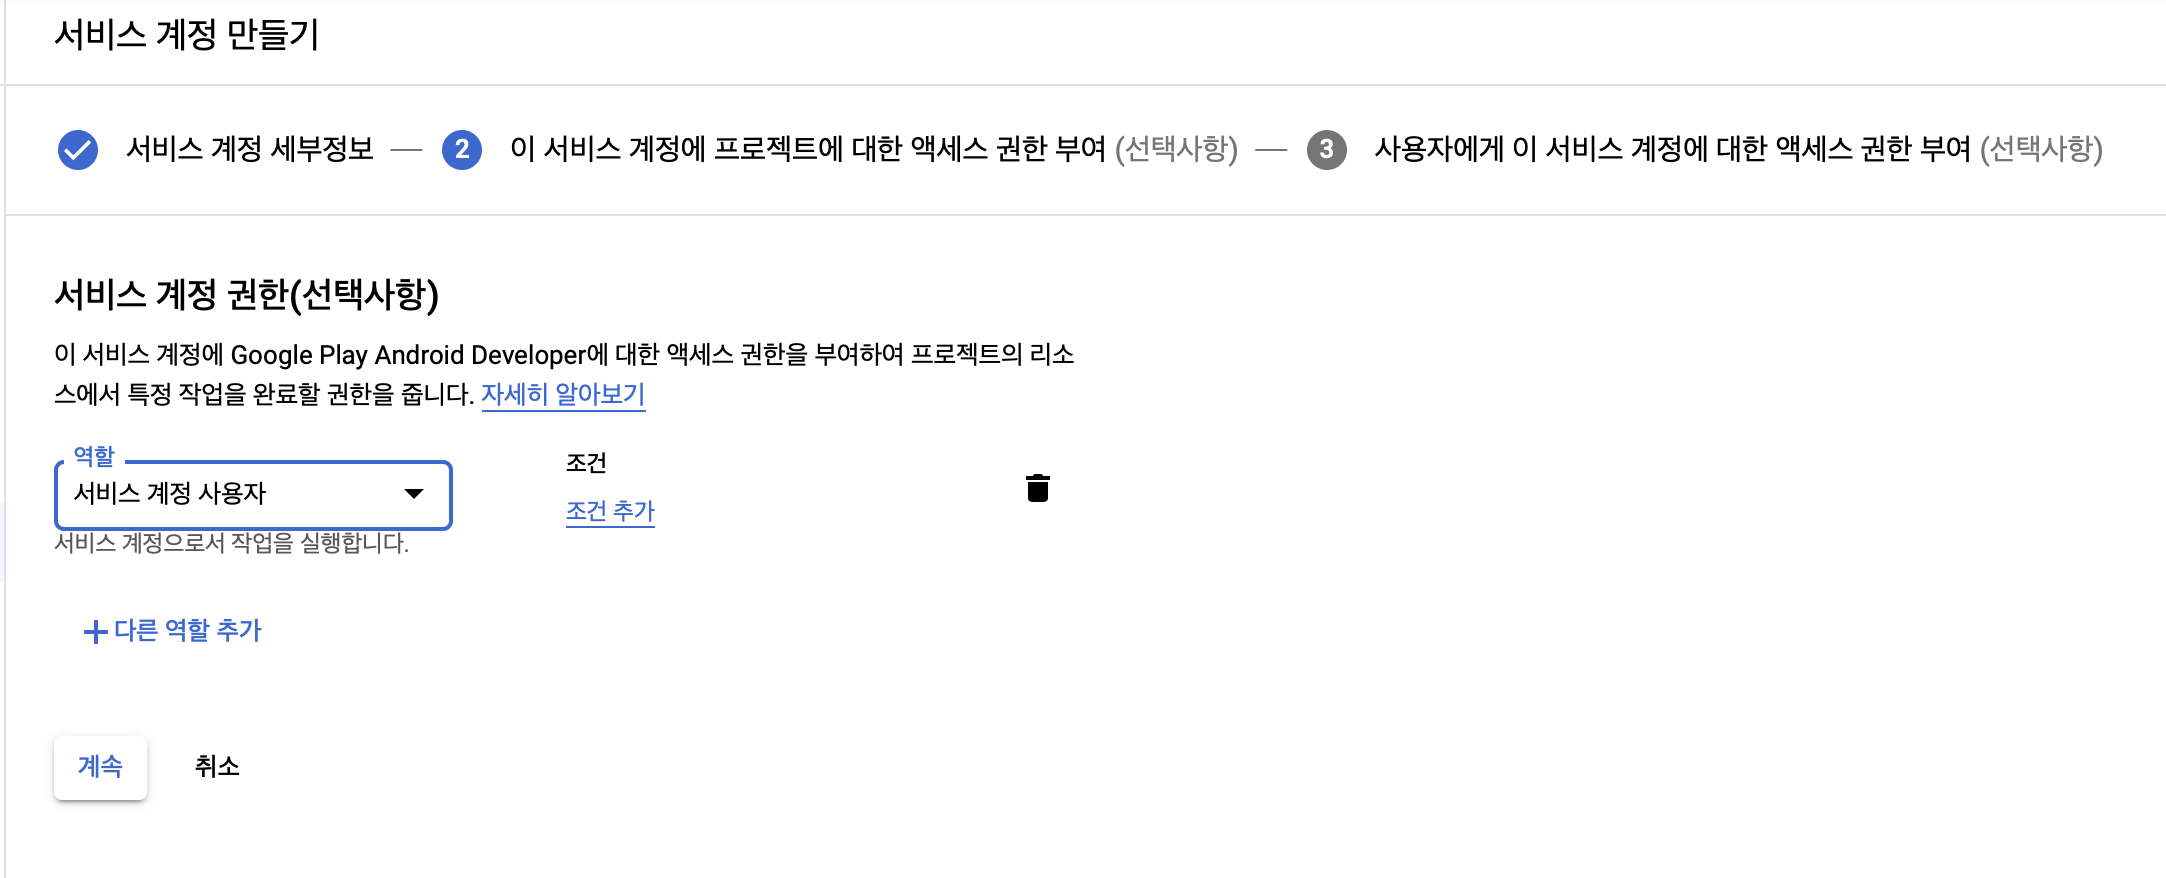
서비스 계정 사용자로 입력해주세요!
3단계. 권한부여
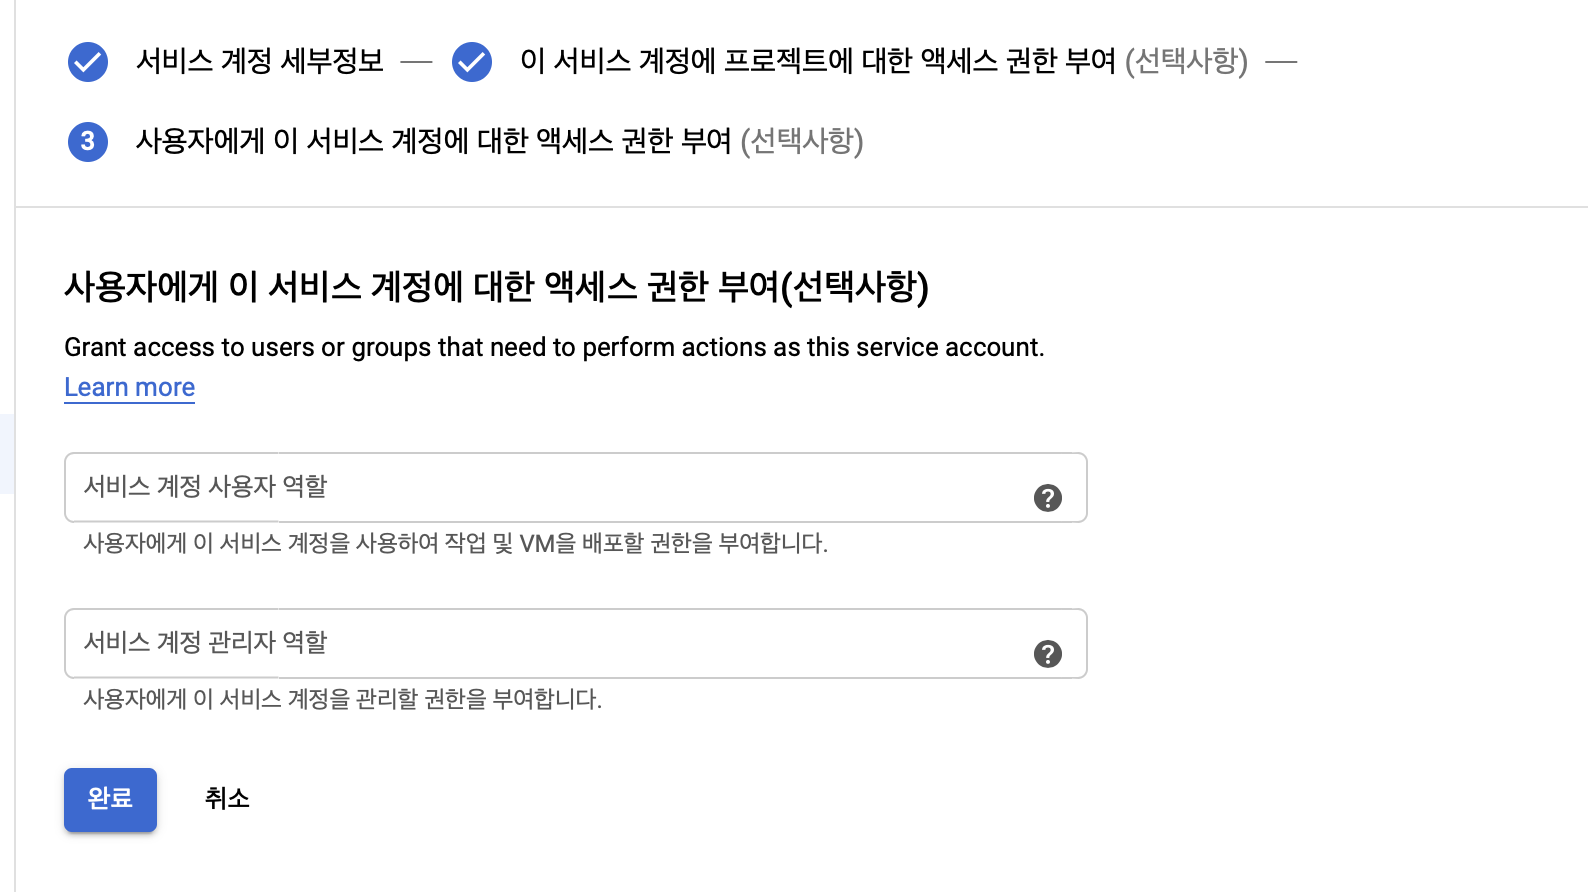
그냥 완료 눌러줬어요
그럼 계정이 생기는데 키만들기를 누르고

JSON으로 선택해주세요

그러면 api-project_id.json 파일이 다운받아지고 열어보면 이런 데이터가 들어있어요.
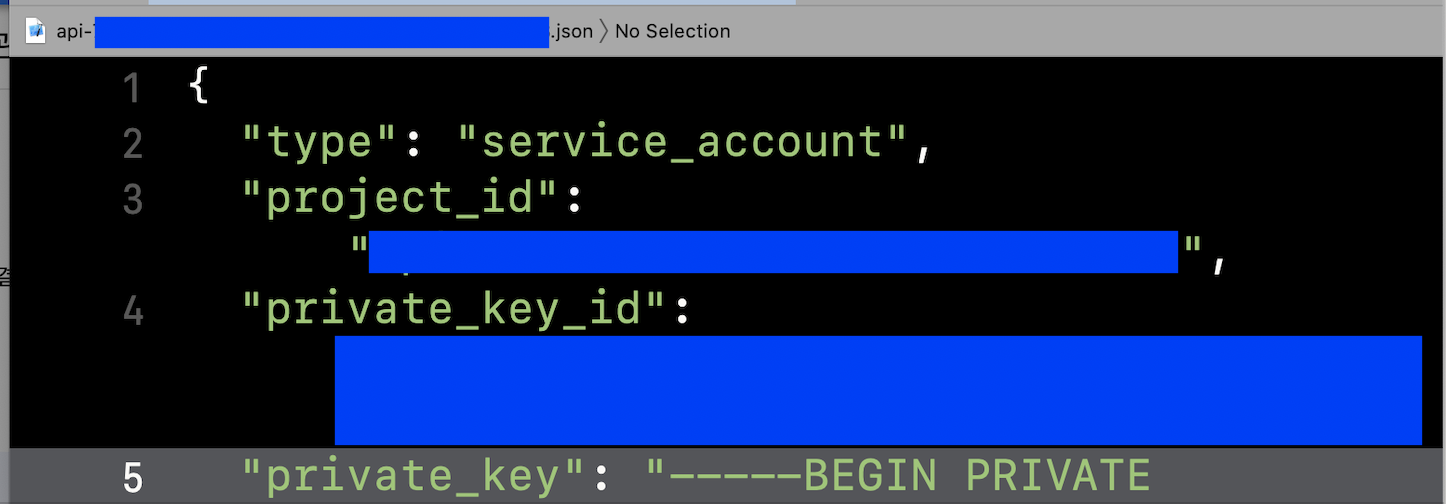
key.json으로 파일명을 바꿔주고 이 파일을 안전한 곳에 저장해주세요-!!
(저는 웹 개발자의 Travis CI 기반 Flutter 앱 지속적 빌드 및 배포 환경 구축기 처럼 android 폴더에 넣어두고 이 파일을 .gitignore에 추가했어요)
그리고 다시 구글 플레이스토어 콘솔에 돌아가보면
서비스 계정이 추가되어있습니다.
액세스 권한부여를 눌러주세요-!!

구글플레이스토어 콘솔의 '사용자 및 권한' 에 들어가면
이제 액세스 권한이 있는 사용자가 두명이 되었어요

(서비스 계정을 저의 안드 앱이름인 awesome-led가 아니라 fastlane 이라고 했어야했나봐요...!! 😭)
그리고 아래 명령어를 통해 다운받은 private key로 구글플레이스토어와 연결이 잘되는지 확인해보겠습니다.
fastlane run validate_play_store_json_key json_key:/path/to/your/downloaded/file.json
성공이네요!

이제 이 질문에 대답해줄 수 있게 되었습니다.
key.json의 file path를 입력해주세요
참고로 나중에 fastlane/Appfile에서 json_key_file의 값을 바꿔줄 수 있습니다.

[4] meatadata
그 다음, metadata 관련해서도 y 라고 답변해줍니다.

그러면 이제 AppFile, FastFile이 만들어졌습니다
AppFile에는 1,2 번에 진행했던 package_name과 json_key_file에 대한 정보가 들어있고
FastFile에는 test, beta, deploy 라는 명령을 쓸 수 있는 코드가 들어있네요

[5] fastlane deploy
이제 아래 명령어로 배포해보겠습니다.
fastlane deploy
오잉 아까 4단계에서 했던 메타데이터 가져오기가 잘 안되어서 에러가 났어요
하긴 메타데이터 폴더가 안생겼더라구요..

그럴땐 아래 명령어를 해줍니다.
fastlane supply init
그럼 메타데이터를 받아왔고

폴더도 생겼습니다.

다시 배포해볼게요-!!
fastlane deploy
그럼 버전 코드를 찾을 수 없다고 나옵니다.

app/build.gradle에 가보면
저의 versionCode랑 versionName은
이런식으로 되어있는 게 아니라
android {
   ...

    defaultConfig {
        versionCode 4
        versionName "4.0.0"
    }
}
이런식으로 되어있어요-!!
def localProperties = new Properties()
def localPropertiesFile = rootProject.file('local.properties')
if (localPropertiesFile.exists()) {
    localPropertiesFile.withReader('UTF-8') { reader ->
        localProperties.load(reader)
    }
}
...

def flutterVersionCode = localProperties.getProperty('flutter.versionCode')
def flutterVersionName = localProperties.getProperty('flutter.versionName')

android {
   ...

    defaultConfig {
        // TODO: Specify your own unique Application ID (https://developer.android.com/studio/build/application-id.html).
        applicationId "com.eunjin.awesome_led"
        minSdkVersion 16
        targetSdkVersion 30
        versionCode flutterVersionCode.toInteger()
        versionName flutterVersionName
    }
}
즉 이렇게 생긴 local.properties 라는 파일의 값을 참조하고 있어요
...
flutter.buildMode=release
flutter.versionCode=4
flutter.versionName=4.0.0
local.properties 값은 pubspec.yaml 파일에서 아래처럼 되어있는 version을 바꾸고 앱번들을 빌드(flutter build appbundle) 하면 같이 바뀝니다.
version: 4.0.0+4
만약 local.properties의 값을 바꿔도 아래 명령어를 하면
flutter build appbundle
pubspec.yaml의 버전으로 local.properties의 버전이 바뀌더라구요..!!
(잘 이해는 못했지만, 이런 이유로 평소에 수동으로 버전올릴때 pubspec.yaml 파일의 버전만 올리곤 했습니다.)
그래서 저는 pubspec.yaml 값의 버전 값을 1씩 올리고 플레이스토어에 업로드하도록
fastfile을 바꿔주었어요
default_platform(:android)

platform :android do
  desc "Increase version from pubspec.yaml"
  lane :increase_version do
      yaml_file_path = "파일패스/pubspec.yaml"
      data = YAML.load_file(yaml_file_path)
      version = data["version"]

      # to_i는 to_integer를 의미하는 ruby 함수.
      version_number = data["version"].split(".")[0].to_i
      new_version_number = version_number + 1
      new_version = "#{new_version_number}.0.0+#{new_version_number}"

      data["version"] = new_version
      File.open(yaml_file_path, 'w') { |f| YAML.dump(data, f) }
  end

  desc "Deploy a new version to the Google Play"
  lane :deploy do
      increase_version
      sh "flutter build appbundle"
      upload_to_play_store(aab: "파일패스/build/app/outputs/bundle/release/app-release.aab")
  end
end
increase_version은 제가 추가한 명령인데, pubspec.yaml 파일에서
version 값을 찾아서 .으로 split한 첫번째 값을 찾아요 (여기서는 12겠죠?!)
version: 12.0.0+12
그리고 1을 더해서 파일에 새로운 버전 값을 써주는 코드입니다.
version: 13.0.0+13
그리고 다시 해보면..!!
fastlane deploy
이렇게 성공이라고 나옵니다.
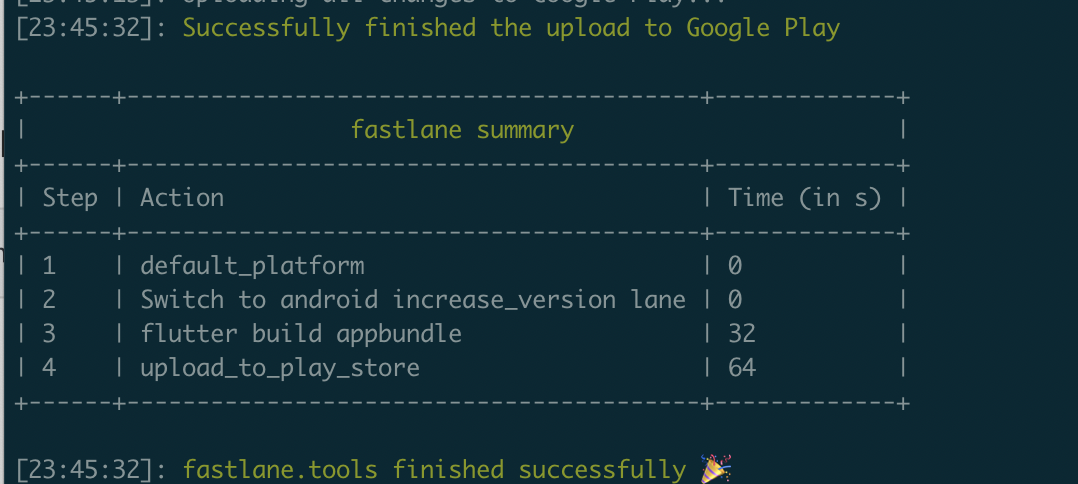
그리고 플레이스토어 들어가면 바로 출시되더라구요...!!

이렇게 바로 출시되는게 부담스러우면 앱번들만 올려도 좋을 것 같아요!+!
그리고 바로 출시되고 버전이나 앱번들 삭제할수도 없는 것 같으니까
조심해서 테스트하세요ㅠㅠ
그냥 10이 땡겨서(??) 버전에 10을 넣어봤다가
이렇게 4에서 11로 앱 버전이 올라갔답니다...😱

아무튼 이제 안드로이드 폴더로 가서
fastlane deploy해주고 릴리즈 노트만 작성해주면 안드로이드 출시 끝-!!! 🎉
[추가]
만약 이 블로그처럼 pubspec.yaml 파일에 의존하지 않는 다면

이렇게 fastfile을 구성하면 됩니다.
default_platform(:android)

platform :android do
  desc "Deploy a new version to the Google Play"
  lane :deploy do
     versions = google_play_track_version_codes
     new_version = versions[0]+1
     versionCode = #{new_version}
     versionName = #{new_version}.0.0

     sh "flutter build appbundle --build-number #{new_version} --build-name #{new_version}.0.0"
     upload_to_play_store(aab: "파일패스/build/app/outputs/bundle/release/app-release.aab")
  end
end
아래 명령어를 쳐보면
fluter build appbundle --help
build-number가 안드로이드의 versionCode, build-name이 안드로이드의 versionName 임을 알 수 있는데요,


fastfile에서 예를들어 아래와 같은 명령을 해준 것입니다-!!
flutter build appbundle --build-number 10 --build-name 10.0.0
그것도 아니라 이렇게 값으로 들어가있는 app/build.gradle이라면
android {
   ...

    defaultConfig {
        versionCode 4
        versionName "4.0.0"
    }
}
이렇게 fastfile을 구성하면 되요!
(여기는 Version Code 업데이트하는 코드만 들어가있는데,
Version Name 업데이트하는 코드도 찾아서 넣으셔야해요!)
  # https://github.com/fastlane/fastlane/issues/878
  desc "Increase versionCode"
  lane :increase_version_code do
    path = '../app/build.gradle'
    re = /versionCode\s+(\d+)/

    s = File.read(path)
    versionCode = s[re, 1].to_i
    s[re, 1] = (versionCode + 1).to_s

    f = File.new(path, 'w')
    f.write(s)
    f.close
  end


  desc "Deploy a new version to the Google Play"
  lane :deploy do
     increase_version_code
     gradle(task: 'bundle', build_type: 'Release')
     upload_to_play_store
  end
end
[Reference]
docs.fastlane.tools/actions/supply/
supply - fastlane docs
supply Alias for the upload_to_play_st
docs.fastlane.tools
'🤼♀️ > Flutter' 카테고리의 다른 글
| [Flutter] Custom Font 추가하기 (0) | 2020.09.18 |
|---|---|
| [Flutter] Flutter로 HTTP 통신하기(get) & JSON 파싱 (3) | 2020.09.17 |
| [Flutter] CupertinoTabBar 만들기 (0) | 2020.09.11 |
| [Fastlane] Flutter 앱 자동배포 구축 - iOS 편 (3) | 2020.08.20 |
| [Flutter] 맥에서 Flutter SDK 설치하기 (13) | 2020.08.13 |
- Total
- Today
- Yesterday
- 구글 Geocoding API
- drf custom error
- METAL
- Dart Factory
- 장고 URL querystring
- PencilKit
- Flutter Clipboard
- github actions
- flutter deep link
- Django Firebase Cloud Messaging
- DRF APIException
- ribs
- 플러터 싱글톤
- Django Heroku Scheduler
- Flutter 로딩
- flutter dynamic link
- ipad multitasking
- Watch App for iOS App vs Watch App
- Flutter Spacer
- 장고 Custom Management Command
- flutter 앱 출시
- 플러터 얼럿
- Python Type Hint
- flutter build mode
- Django FCM
- Flutter getter setter
- Sketch 누끼
- SerializerMethodField
- cocoapod
- Flutter Text Gradient
| 일 | 월 | 화 | 수 | 목 | 금 | 토 |
|---|---|---|---|---|---|---|
| 1 | ||||||
| 2 | 3 | 4 | 5 | 6 | 7 | 8 |
| 9 | 10 | 11 | 12 | 13 | 14 | 15 |
| 16 | 17 | 18 | 19 | 20 | 21 | 22 |
| 23 | 24 | 25 | 26 | 27 | 28 | 29 |
| 30 | 31 |